
Scleral Profilometry-Guided Fitting
Scleral Fitting - the modern way

Until recently, the way we measured the eye for scleral lenses had some limitations. Traditional corneal topographers can only map the cornea, the central, transparent part of the eye, while the shape of the sclera (the white part of the eye) remained largely uncharted. This meant we relied on diagnostic fitting sets, placing sample lenses on the eye and assessing the fit by eye. With skill and experience, we could estimate how much depth and edge adjustment was needed, but it often involved a degree of trial and error before achieving an ideal fit.
To overcome this, we have invested in an advanced Eaglet Eye Surface Profiler (ESP). This remarkable technology captures a highly detailed 3D map of the entire front surface of the eye, including the sclera. By understanding the precise contours of the eye, we can design lenses that fit with exceptional accuracy, removing most of the guesswork.
The result is a faster, more comfortable fitting process, fewer trial lenses, and a lens that matches your individual eye shape perfectly..
How scleral profilometry works

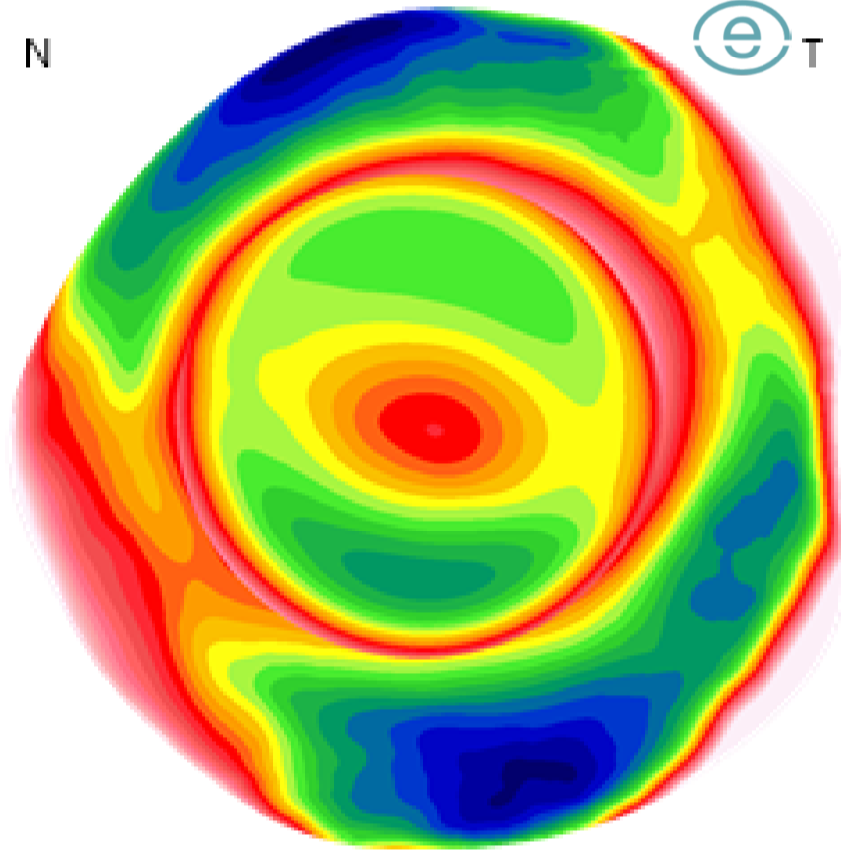
Corneal topography image showing advanced keratoconus. There is no information about the scleral shape, only the corneal shape.
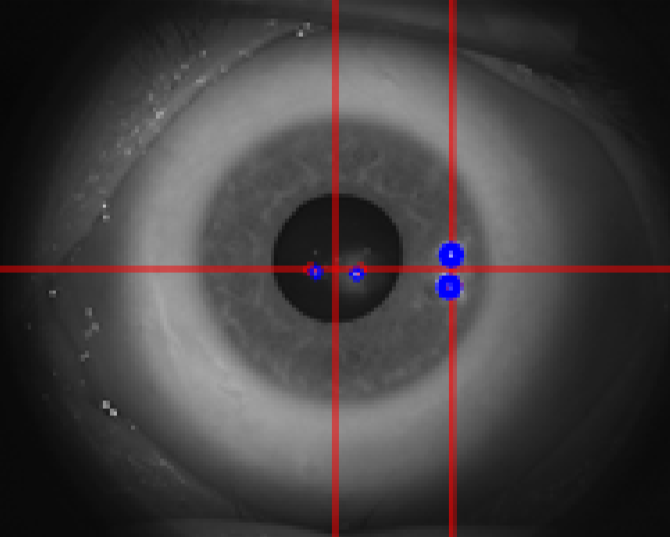
During an ESP scan the lids are retracted to show as much of the sclera as possible for thorough and accurate scanning.
The resultant ESP scan shows a map of the visible part of the front of the eye, allowing a freeform lens to be custom-designed to fit this asymmetrical sclera perfectly.
Unlike traditional corneal topography, scleral profilometry maps the entire front surface of the eye, including the area where a scleral lens actually rests. The detailed profile it produces allows us to design a lens that follows the eye’s exact contours, improving the initial fit and reducing the time needed to achieve a perfectly fitted lens.
This approach is ideal for eyes with mild to moderate scleral asymmetry or irregularity. It enables us to create a comfortable, stable scleral lens with fewer appointments and a highly precise fit.
How scleral profilometry can help you
Much like EyePrintPRO, the Eaglet Eye Surface Profiler (ESP) enables us to design a custom scleral lens based on a digital 3D model of your eye. However, unlike EyePrintPRO, it does not require taking an impression of the eye’s surface. Instead, the ESP captures thousands of data points to create a detailed computerised map that accounts for even the smallest surface irregularities, such as pingueculae.
This means:
• Far more accurate ocular measurements
• Fewer visits to achieve an ideal fit
• Greater comfort and lens stability
• Easier fitting for asymmetrical eye shapes
• Excellent lens alignment for HOA-correcting Wavefront Lenses
ESP-guided scleral lenses are ideal for people with irregular corneas who want a precisely fitted lens but do not need prism correction and do not have a highly distorted sclera. They are an excellent option for eyes with moderate scleral asymmetry, where a standard scleral lens may not fit perfectly and a faster, more efficient fitting process is preferred

The Process
1. Take Scans
After careful assessment of suitability, we will take ESP scans of your eyes along with additional measurements. We will discuss whether standard scleral lenses or more customised Freeform lenses are recommended for your eye shape.
2. Order Lenses
Your lenses are ordered to your specific shape and prescription. A 50% deposit is taken at this point.
3. Collect Lenses
At collection we will check the fit and power of your new lenses. You will be shown how to apply, remove and care for your lenses. You then take them away to start wearing them at home.
4. Follow-Up
You will return for a follow-up appointment 2 to 4 weeks later to review your progress, address any issues and make sure everything is as perfect as it can be.
5. Adjust If Needed
If any changes are necessary, new lens / lenses will be ordered at this point. You will wear these new lenses and then potentially return for additional follow-ups, as needed.
